

The kitchen in the dollhouse was already beginning to give me nightmares, I was dreading working on the cabinets and had to figure out what to do for the the splash black, walls and tiling.
As I had already done the entire house with a wood grain flooring, I decided to switch the original kitchen to the other side of the house, so the lounge room has more living area and so that i can use the under stairs area for the animal pet section in the kitchen.

The original kitchen was dark and industrial looking, even though I loved it, the flooring was a bit worse for wear so it had to come up.
I moved the kitchen to the original lounge room area as per picture below.

My own house has wooden floorboards which continue through the kitchen, so I didn't want to worry about making tiles for the floor in order for the room to look more authentic.
So as I don't have tiles in my own kitchen, i decided the new wood floor would stay.
For the splashback I had some rose/copper gold contact sheeting from a previous project I worked on and had enough to use for part of the kitchen.

I really like the look of bricks, and whilst I was at work recently I came across some faux brick sheeting from a hobby shop close by, so I purchased It for the walls and also bought some balsa wood to use for the kitchen cabinets etc.

The large window on the back wall was making it impossible to position any cabinets nicley, so I made the decision to take it out.
I created a new sub wall from mdf, removed the window and framing and stuck the new wall over the top.
Painting it white prior.

I inherited with the original doll house a small kitchen which has three units and a fridge.
The cabinets came with a sink, one with a stove and the other just had a bench top, all with opening cabinets.
The problem was the cabinets were not 1:16 scale and too short for Barbie, so my solution was to make some fake cabinets underneath, lifting the height of the original kitchen to where it should be.

The original kitchen was a light blue colour and the fridge was pink,

As nothing matched and everything was in need of a refresh, I painted all of the cabinets and fridge a lilac/grey shade before I started working on the rest.

The original blue shown on inside of cabinet below

The cabinets were all different heights, however I kept all the bottom cabinets the same height in order to make it look uniform and to fit the sink under the only window in the room.
I added a bench top from balsa wood to the top of the units.

I then fnished the cabinets off with gold stud earrings which I had I found as a pack of 8.

I added them by pushing them through the wood and gluing them from the inside so they can't come out.

Once the cabinets were made I positioned them to where they should be before figuring out where i was going to glue the splashback.
I decided to use the brick for most of the wall along with a small amount of rose gold along the bench area, down the side of the sink and behind the stairwell, leaving one wall only the original pink.

This is where I also added the pet area, complete with homemade cushions a kennel from balsa wood and some Barbie animals.

I needed a wall cabinet to put the plates in etc so I used an old wooden box which I had, i repainted it and then stuck it above the bench.

It opens and can hold all of the plates, cups and kitchenware Barbie has.

The stove hood was made using some thin silver plastic which I glued together.

Then i glued some of the brick onto it to match the wall.
The stove backsplash was part of the original blue kitchen, with off white tiles embossed into the plastic.

As I wanted the kitchen matching i glued more of the faux brick onto the stove backsplash and painted the edging gold.
I also painted the stove top black with silver hot plates, with a red circle in the middle of each.

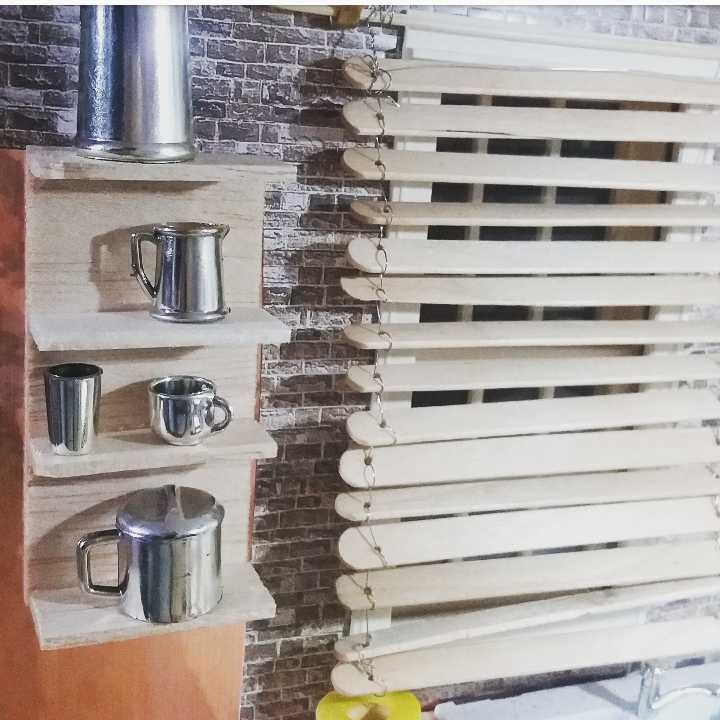
I loved the look of the the blinds in the bathroom made out of paddle pop sticks by drilling holes into the end and weaving florist wire through to secure them into place.
So i made another one for this room.

I also inherited some silverware with the house and wanted to display some, so I made this quick shelving unit from balsa wood and glued it to the wall next to the window.
To match the cabinets, I needed an island with seating to finish off the kitchen, this was very easy to make and as it was going to be played with it needed to be durable, so I made it out of wood again with some mat white perspex for the top.

The bench island need some seatss, so I made some quick easy stools from balsa wood to match.
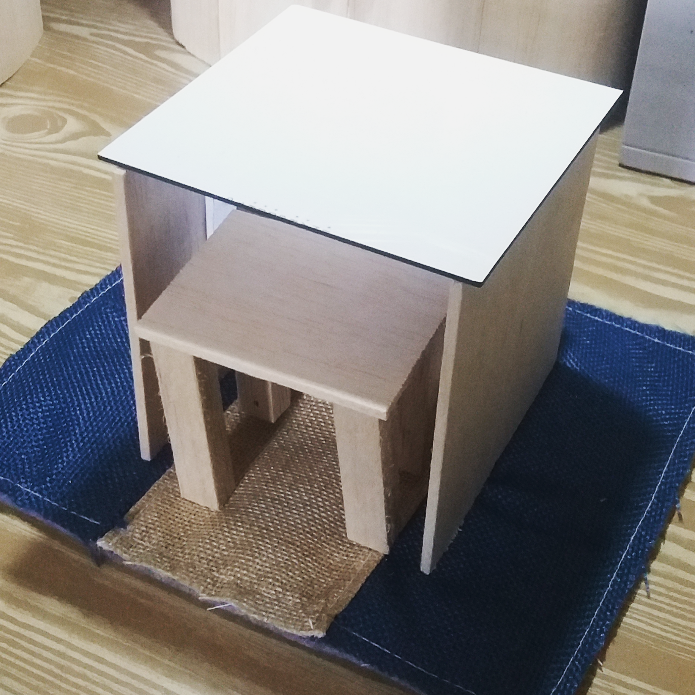
I used thin wood for the top and made the legs from a thick stip of balsa.

To finish off the island i needed to create a cozy kitchen rug which I did from some woven material in tan and navy blue.

I also made another mini version for the bottom of the stairs in between the kitchen and lounge area.

As I hadinherited some cutlery with the house, but the pieces were so small and easily lost with a small child, I didn't want all of them sitting in a bag waiting to be played with, so I decided I would use some of them.

I used some small pieces of balsa wood and glued the cutlery to each piece and then glued the wood to the wall.

They display nicley now and are safe from little fingers or mouths, as they are almost impossible to pull off.

I have alot more pots and pans and small knives and forks, but i have kept the rest aside for when my girl gets older and it's safer for her to play with them.

I think the accessories finished off the space, but i still needed a picture or two to complete it.
I found this picture which i thought matched the vibe of the house (tropical boho) and framed it with some paddle pop sticks.
I loved the finished picture!

I also made a mini towel dispenser complete with a working roll for the side of the cabinet unit.

Last but not least I made a small garbage can for all of the scraps to go into.
This was originally a mentos container which I covered in marble contact paper and heart print tape.

This kitchen took me alot longer to finish than expected, but I am really happy with the end result and my new found miniature diy prowess..
I actually am really enjoying making things now and can't wait to get started on the next room !
KJ xoxox

No comments
Post a Comment